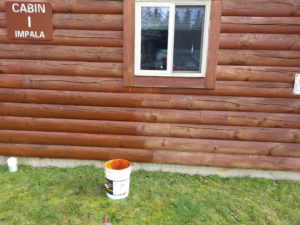
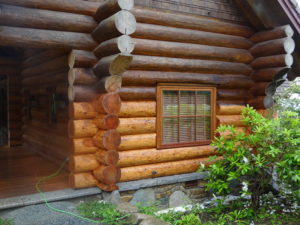
Just as you wouldn’t wax your car prior to washing it, you shouldn’t stain your home prior to removing all topical mildew, dirt, dust, pollens and other contaminants. It’s not that unusual to spend as much time (or more) prepping your logs to be stained as on the staining itself. Don’t take shortcuts. This does not mean all existing stain always needs to be removed prior to re-staining. At times it should be removed and at times it doesn’t need to be. There are several variables to consider when deciding if the old stain needs to be removed. Here is a picture of a log cabin I stained with the owner deciding to not strip everything down to bare wood. You can see the original condition followed by the new look of a refresher coat of stain being applied on top.
Log Cleaner & Water
If an inexpensive log cleaner (soap) and water cleans your logs to your satisfaction, you won’t need any of the following costlier and more time consuming methods. When determining what cleaning method to use, I always start out with the easiest, least expensive option first. For example, why assume your home needs to be media blasted when a soap scrubbing and rinsing will give you what you want?
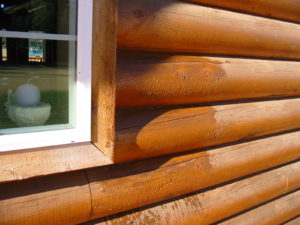
The photo below illustrates how big of a difference simply wiping your logs with a wet sponge can make. It’s evident this home wasn’t ready to be stained until first cleaned. Actually, after it was cleaned, it didn’t need to be re-stained.
If your first choice doesn’t give you your results, you or I will need to proceed to a more aggressive method with better results. Some cleaners may work by spraying a log surface with a mild log cleaner then either pressure washing or hosing off. At times, hand scrubbing may be necessary.
Note: Bleach will not remove a stain or dirt, but will often remove some mildew, and in doing so, can at times also brighten your logs. Bleach should never be used at full strength. A dilution of 1 part bleach to 4 parts water often works well and it is of critical importance to completely rinse all bleach residue from your logs. How much rinsing that will be necessary will greatly depend on whether you’re rinsing it off stained logs or if your wood is bare.
Pressure Washing
You’ll hear different recommendations on whether you should have your home pressure washed or not. There’s no uniform answer to this. If pressure washing is used (the most popular method of log cleaning in the industry) this will be the quickest method and can have stellar results. It should at least be considered before employing the dry media blasting method for a few reasons. It could be much quicker, easier and definitely is more cost effective. One fallacy is that you’re saturating your logs with water as a result of pressure washing, thus “ruining” your wood. This is an absurd premise. On hard, sound, rot-free logs, you’re only introducing water into the top fibers of the wood and dries out very quickly. Your decision on pressure washing should be dependent on the results you want and whether or not your gaps are conducive to allowing water in your home. If you choose to go with a pressure washing, and your home has numerous gaps that will allow water to infiltrate, we also always have towels on hand for us to clean up infiltrated water. The one exception of being able to pressure wash the interior of your home could be if after your walls are stacked and long period of time goes by before the roof is erected. This exposure could cause some mold and mildew to form, particularly in a damp or humid environment. Remember, mildew does not damage or weaken wood.
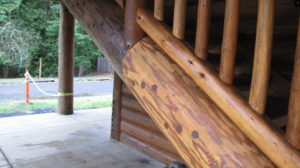
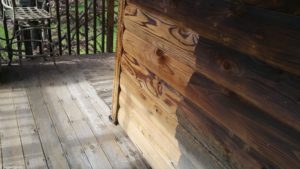
The degree of pressure used will vary tremendously. A low setting of 1500 psi could be sufficient to simply remove UV graying that’s taken place over few months. Something closer to 2500 – 3000 psi may be necessary on many logs. Remember, the higher psi used, the higher the probability that some fuzzing of the wood could take place, but not always. If you choose, this end effect can be buffed or sanded off prior to staining.
Depending on temperature, humidity and your logs, they can be stained as early as a day after pressure washing. At times a week or more may be necessary to wait.
Chemical Stripping
While solvents aren’t as popular as they once were, this process could be the necessary means depending on the type and amount of finish we are removing without going to the more expensive media blasting method. Since potassium hydroxide, sodium hydroxide or methylene chloride based strippers are generally used, protective gear (including eyewear) should always be used. In effect, strippers will soften the bond the stain has to the wood which then makes it much easier to pressure wash off. After applying the stripper, let it stay in place as long as recommended by the manufacturer, then pressure wash off.
Often a lower pressure setting can be used to remove the applied chemical stripper than with pressure washing alone, but not always. In addition, a rinsing with an oxalic acid following a high pH level stripper at times is done in order to return the pH level of the wood back to where it needs to be to properly accept a stain. Proper care should be given to surrounding grass and foliage as well when chemical stripping. Wetting down the areas you want to protect, covering with plastic tarps and rinsing again after the project with water normally does a good job of protecting your plants.
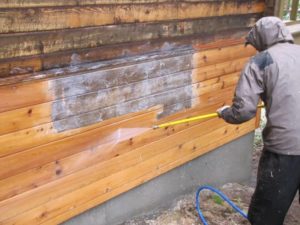
Remember…ALWAYS apply a stripper (or any cleaner) from the bottom and work up. This process will help eliminate any spotting effect caused by upper logs dripping strippers/cleaners on lower ones. Also, you don’t want to apply strippers on such a large area that it will dry before you have a chance to pressure wash it off. I generally will apply a stripper in an area of 50-100 square feet at a time, depending on temperature. In addition, when pressure washing off a stripper, it’s nearly impossible to not get any water on areas of your wall where you haven’t yet applied the stripper. This being the case, you’ll then need to apply the stripper on another (dry) area of the house to pressure wash off since strippers don’t work well when applied to wet wood as it immediately becomes diluted and won’t have the same effect when “dissolving” the stain. Strippers also always work best in warmer weather.
Media Blasting
While one wouldn’t sand blast a log home due to the potentially severe damage it can do to your surface, media blasting over the years has evolved into a very popular, solvent free finish removal system. It is generally reserved for homes that show a very high degree of neglect or weathering. A modified “sand blaster” and a large air compressor (125 CFM or greater) is used to blast your surface with ground up walnut shells at a very high velocity and relatively low volume. Coverage one can expect from a 40-pound bag of blasting grit can vary from 40-50 square feet up to 150+ square feet. Factors include amount of pressure (psi), size and effectiveness of compressor, hardness of your logs, moisture content of your wood, experience of the applicator and most important, the type and amount of finish you’re removing.
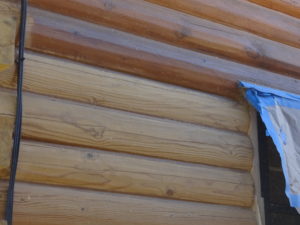
While the media won’t rough up your log surface to the extent a sand will, it also won’t leave your home with a “hand-sanded” finish. You can always choose to buff or sand your log surface lightly after a blasting to minimize the effect of the pitted texture blasting may leave. Crushed walnut shells are biodegradable and won’t harm your plants. If recycling the walnut shells back in to the machine after shoveled up off the ground, it first needs to be sifted with a screen to prevent bark, rocks and other things that could clog the nozzle of the blaster. While there are various types of media blasting grit available, I choose the walnut shell as it comes in various grit sizes and isn’t as abrasive as glass beads which is also much, much more difficult to clean up.
Sanding
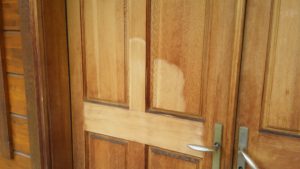
Hand sanding (as seen below) or anything by mechanical means (planer, angle grinder, orbital, etc.) gives you the best results but also is (by far) the most time consuming. A good sanding or grinding of your logs will provide a very smooth finish which means your logs will stain substantially lighter since the stain won’t soak in as deep. Your coverage will also substantially increase from 200 – 300 SF per gallon to as much as 450 SF per gallon. After a sanding, make sure to brush or use an air compressor to blow off any dust particles prior to staining so it doesn’t interfere with the stain’s adhesion.
Feel free to contact me if you’d like me to look at your home and give you a proposal of what it would take to return your logs to the protection and aesthetics you had years ago.